As a developer, I always like to automate things (even if it takes more time to set these automations up than to do the work manually). One of these things is the deployment process of web services / sites. Since this blog and my personal portfolio website are hosted on Vercel, I don’t have to worry about deploying them myself. The GitHub repositories are connected directly to Vercel, and every time I push a new commit, Vercel automatically deploys the changes.
But for other projects that are running on a cheap VPS, the story is different. I have to deploy them manually, which is not a big deal, but it’s not as convenient as having it done automatically. This is why I decided to set up an automation process for deploying these projects. The first project (or rather group of projects) I set this up for is the “Forum für Antike und Gesellschaft”. It consists of multiple services, such as the frontend, database, additional micro-services and more. You can read more about all the components of this project in this article.
So let’s see how the automations work, what tools I use and how you can set up something similar for your projects as well.
Generating releases
If you know what conventional commits and semantic release are, you can skip to the next chapter.
The first step in the deployment process is to generate a new release. For this, I use semantic-release in combination with a GitHub action. Semantic-release is a tool that automates the versioning and release process based on the commit messages since the last release. Let me explain:
When I commit changes to the repositories, I follow a specific commit message format called Conventional Commits. With this format, the commit messages are structured in a way that semantic-release understands what type of changes I made. For example, if I add a new feature to the homepage, I would write a commit message like this:
feat(homepage): add new feature XYZOr if I fix a bug in a (theoretical) login form:
fix(login): prevent unauthorized access when submitting the formThese commit messages are then analyzed by semantic-release inside a GitHub action, every time I push something to the repository. Depending on the type of change the version number gets bumped accordingly. Fixes bump the version by a patch (1.2.3 -> 1.2.4), while new features bump the version by a minor (1.2.3 -> 1.3.0). Normally, major (1.2.3 -> 2.0.0) versions are reserved for breaking changes of libraries that are not backwards compatible with the old version. But as I use this mostly for standalone frontend projects, I use these major versions to signalize major big features or (partial) rewrites of the project.
In addition, describing the changes in the commit messages allows semantic-release to also generate a changelog for the release. In this changelog, all changes since the last release are listed. This makes it easy to see what has been added, changed or fixed in the new version (again, this is more useful for libraries or products than just websites). One entry of such a changelog can then look like this:
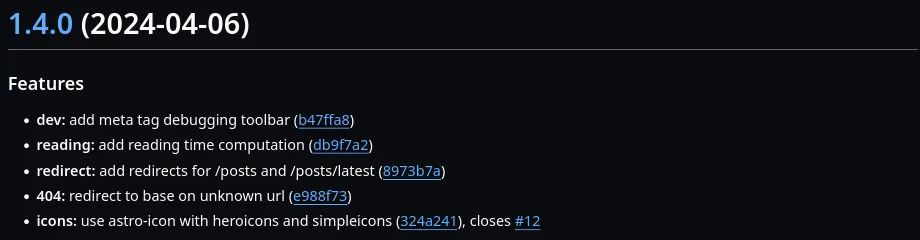
Following a simple convention when writing commit messages, allows me to automate the version numbering and eliminates the need to write some form of changelog with no extra cost or work to do. Using conventional commits together with semantic-release is a handy combination that I can highly recommend for every project.
Automatic deployment
Next up is the automated deployment of new releases. As I mentioned earlier, projects like this blog are automatically deployed by Vercel when I push a new commit, so I don’t have to worry about it.. But for the “Forum für Antike und Gesellschaft” project, I have automated the deployment process myself using webhooks. After a new release is generated the process is like this:
- GitHub sends a webhook to my server, signaling that a new release is available.
- The server receives the webhook
- The server pulls the latest changes from the repository
- The project is built
- The program is restarted with the new version
So let’s see how I set this up.
Receiving and processing webhooks
The most important part of this setup is the webhook server that receives the webhooks from GitHub and triggers the corresponding actions on the server. For this I use a tool called webhook. Webhook is a lightweight server that listens for incoming webhooks, compares the incoming data with the defined rules and triggers some configured actions.
I created a config file for every project or micro-service that is deployed on the server. Such a config file may look like this:
- id: my-project
  execute-command: "/path/to/custom-script.sh"
  command-working-directory: "/path/to/project"
  trigger-rule:
    and:
      - match:
          type: payload-hmac-sha256
          secret: my-secret
          parameter:
            source: header
            name: X-Hub-Signature-256
      - match:
          type: value
          value: tag
          parameter:
            source: payload
            name: ref_type
      - match:
          type: regex
          regex: "^v\\d+\\.\\d+\\.\\d+([^\\w.-]|$)"
          parameter:
            source: payload
            name: ref
Let’s break it down.
The first part is the general configuration of the webhook.
In my case I create a unique id for the server to differentiate between the different projects and webhooks.
The execute-command is the script that runs my deployment code when the webhook is triggered and all the conditions are met.
And the command-working-directory is the directory in which the script should be executed.
In my case this is always the directory in which the project lives.
The trigger-rule ensures two things:
The webhook is coming directly from GitHub by checking the HMAC signature of the payload which I configured in the GitHub webhook settings.
You can configure these webhooks on GitHub in the repository settings under “Webhooks”:
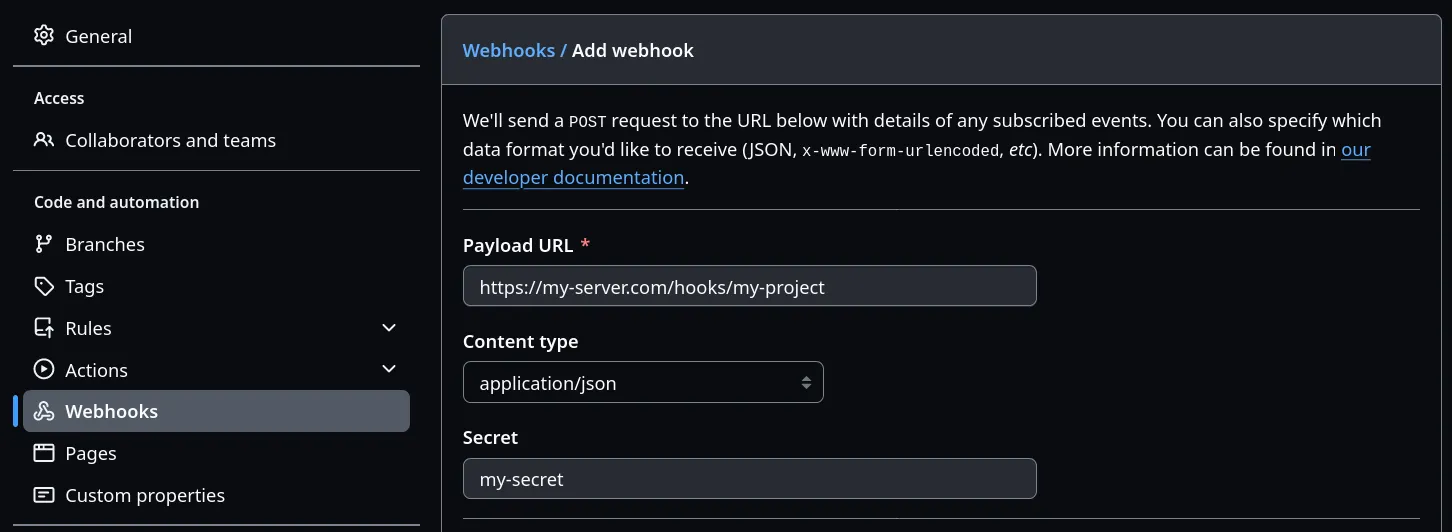
Pro tip: Set the content type to application/json and safe yourself from wondering why it’s not working.
As a trigger event, I only want this to happen when a new tag is created, so I also updated this in the webhook settings.
The other two rules ensure that the webhook event is really a tag creation (since GitHub groups the tag events together with branch creation events) and that the tag is a valid version number. For the production release I explicitly exclude pre-releases and other tags that are not following the semantic versioning format. For pre-releases I have a separate webhook that triggers a deployment to the staging environment.
If you want to use webhook yourself, check out the documentation and look at all the examples for rules or whole setups.
Deployment script
When the webhook is parsed and all conditions are met, the custom deployment script is executed. This script looks something like this:
# Update repository
git fetch --all
git checkout --force "origin/production"

# Install dependencies and build project
pnpm install
pnpm run build:production

# Restart the service
pm2 restart ecosystem.config.js --env production
The first step is of course to update the repository to the latest version. I could also parse the version number from the tag that triggered the release, but since I know that the tag was created with the latest commit it’s fine to just pull the latest commits. Then I install all the needed dependencies (in my case with pnpm) and build the project with the corresponding build command. Depending on you setup you may need to configure the script to load node and npm from the correct paths. After the built was (hopefully) successful, I can restart the service by loading the configuration file for pm2 which restarts the service with the new version.
Using these npm scripts like build and a pm2 configuration file allows me to leave this deployment script rather generic and reuseable for other projects.
If I need extra steps for a specific project, I can add just them to the prebuild or postbuild scripts in the package.json file in the project itself.
Or if I want to change the deployment settings like the number of instances, I can do this in the pm2 configuration file.
But what if I need to adjust something in the deployment script itself?
No problem, since the configuration file for the webhook and the deployment script are just text files, I put them in a git repository as well. So when I need to change something, I can:
- Change the file in the repository with some updated settings
- Commit the changes and push them to the repository
- GitHub triggers a webhook after each push to this deployment repository
- The webhook server receives the webhook, pulls the latest changes and restart the webhook server itself
But what if the deployment script fails?
Sending success notifications
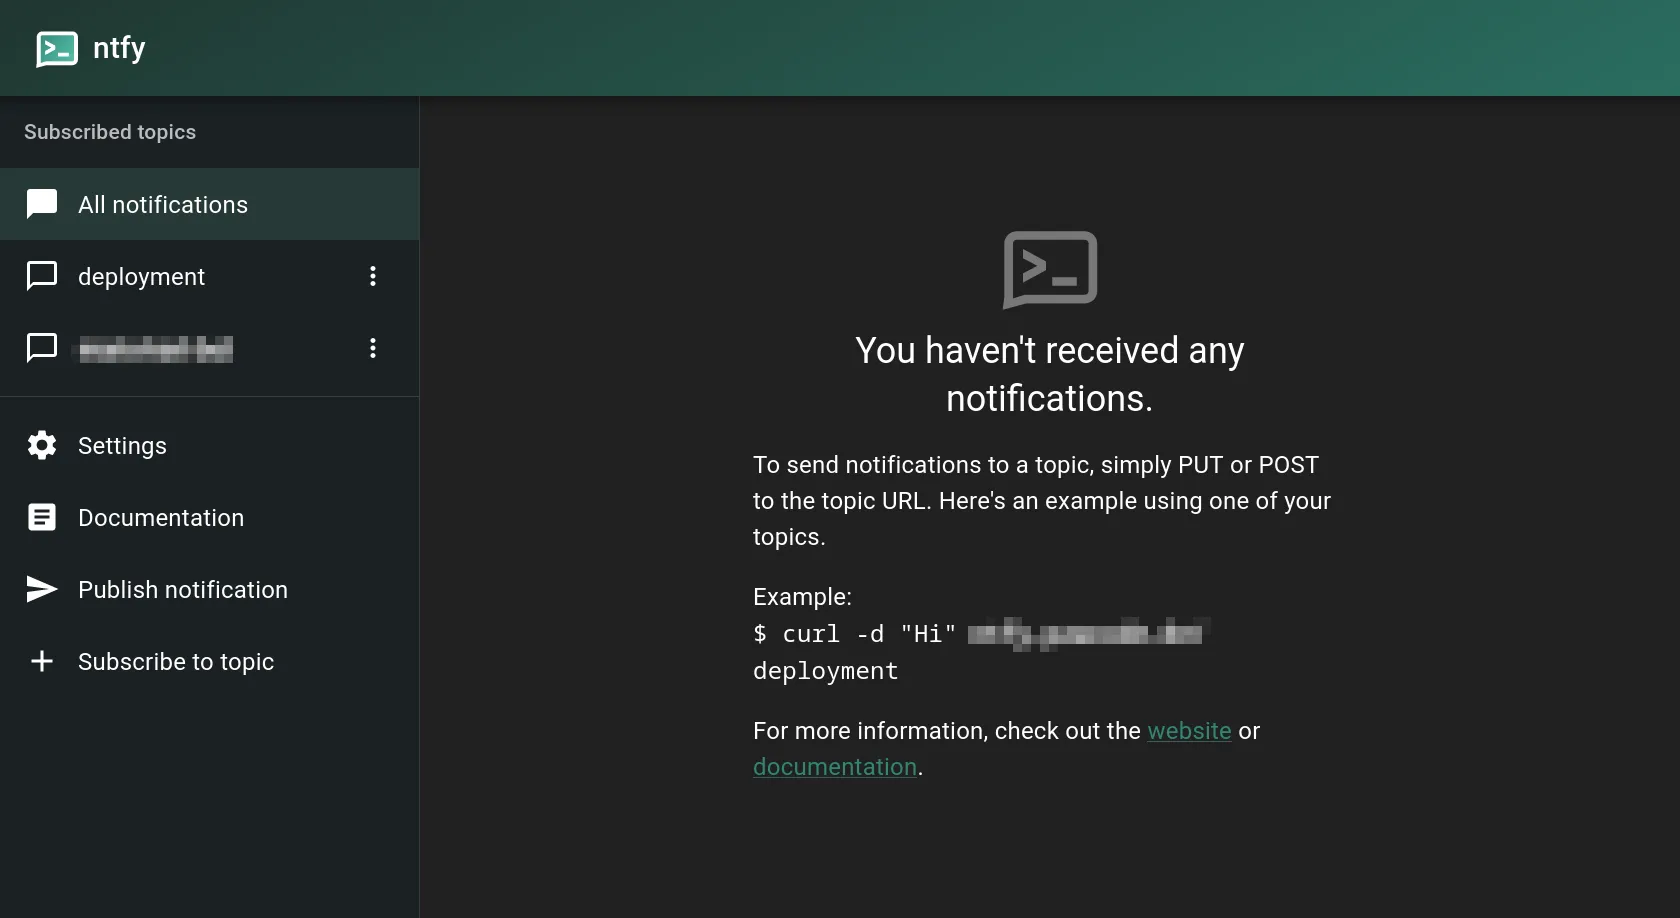
This is where ntfy comes into play. ntfy is a simple messaging service that can be easily self-hosted. It allows you to create different topics to which you can either write messages and / or subscribe to listen for new messages.
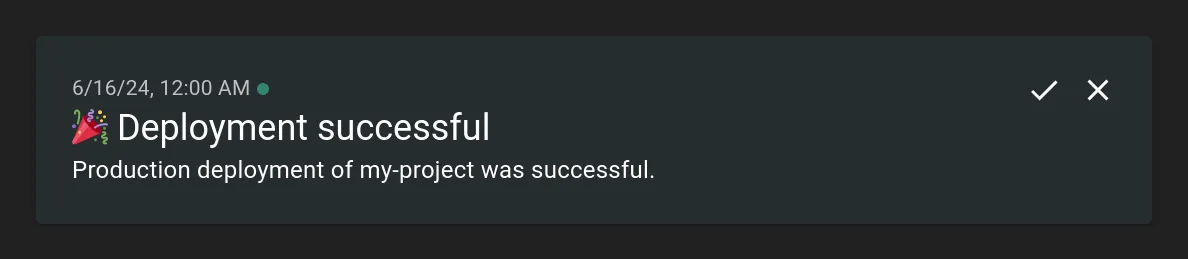
For the deployments, I created a topic called “deployment”, to which my automations publish messages, when they were successful. So I appended the following to my deployment scripts:
# After everything else is done

# Notify
curl \
    -u :tk_my-token \
    -H "Title: Deployment successful" \
    -H "Tags: tada" \
    -H "Icon: https://link.to/a-nice-icon" \
    -d "Production deployment of my-project was successful." \
    -sS \
    "https://my.ntfy.url/deployment"
Since this is the last step in the deployment script, everything running before has to run successful for the message to be sent. This way, I can be sure that when I receive the message after a few seconds / minutes the new version was successfully deployed. Only when the message is missing, I have to actually login to the server and check what happened.
Besides these notifications you can also use ntfy for all kinds of other stuff. Wanna know when a long running script or command has finished? Just append a command like the one above and you will be notified. Wanna send error logs of a small Discord bot you built? No problem, just send the errors directly from your program to a dedicated topic.
Conclusion
To summarize everything in my automations:
- Use conventional commits together with semantic-release to automate the versioning and release process
- Use webhooks to trigger an automated deployment script which downloads the latest code, builds and deploys the project
- Use a message service like ntfy to notify yourself about successful deployments (and to check if the message doesn’t get sent)
Building these automations was a really fun side-project on its own. Even though it currently works well enough for my use-case I’m sure there is a lot to improve or add to this. For your projects you can also pick and choose, which parts you wanna use.
Configured Vercel for automatic deployments? Then just add semantic-release and you’re good to go.
You manage the version tags by yourself or want to deploy on every commit? No problem. Then don’t use conventional commits (even though I always recommend it) and adjust the webhook configuration accordingly.
While something like Kubernetes is way more powerful than just a bunch of automations, it’s also way more complex and probably overkill for just some side-projects that you host yourself. But I may checkout Coolify in the future. It looks interesting enough for me to want to try it…